


With macOS Tahoe, Apple is introducing a brand new Liquid Glass search for the person interface. This new look entails clear components the place some sections on display will have the ability to present components layered beneath them. It offers macOS a contemporary, new look. (Or makes it look slightly like Home windows Vista, in case you’ve been utilizing computer systems lengthy sufficient to know that reference.)
When you don’t like the brand new clear look or if it impacts how effectively you’ll be able to see gadgets, there’s a approach to scale back it, and in some situations, flip it off. Right here’s easy methods to scale back transparency in macOS Tahoe.
Learn how to scale back transparency in macOS Tahoe
- In System Settings, go to Accessibility within the left column.
- In the principle space of the window, search for the Imaginative and prescient part. Choose Show.
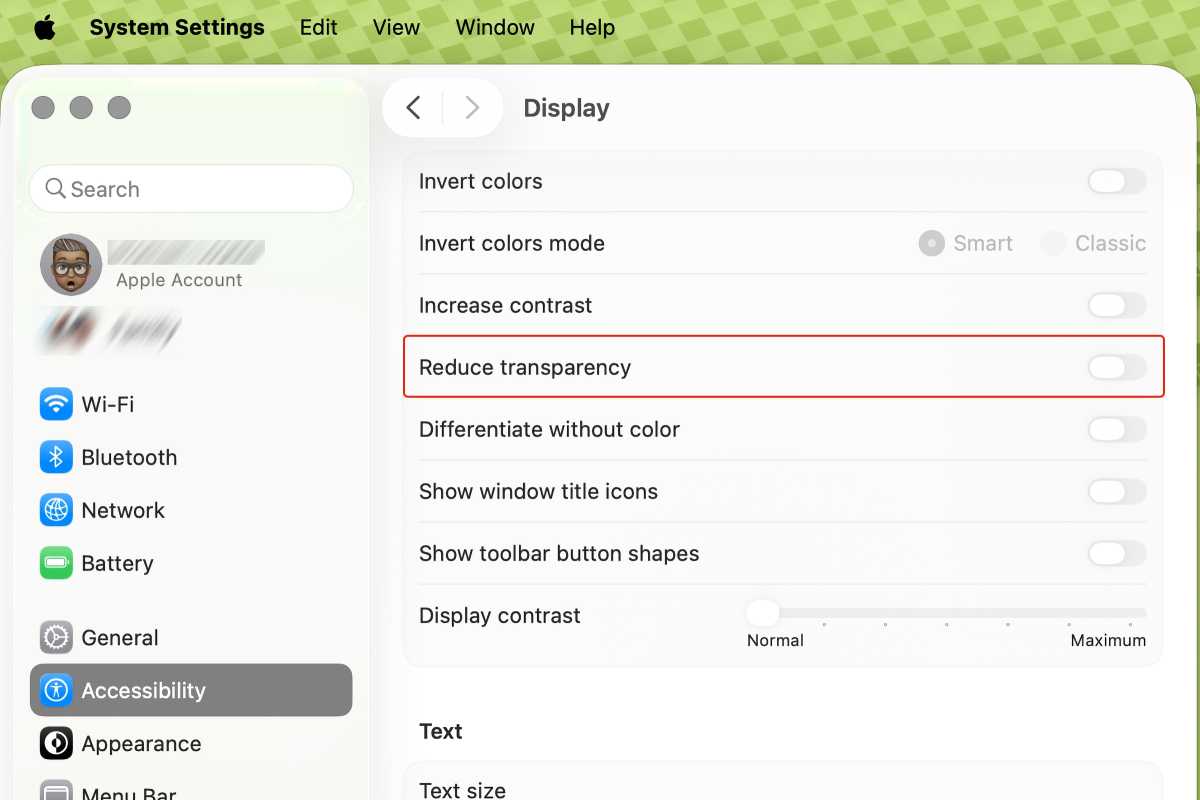
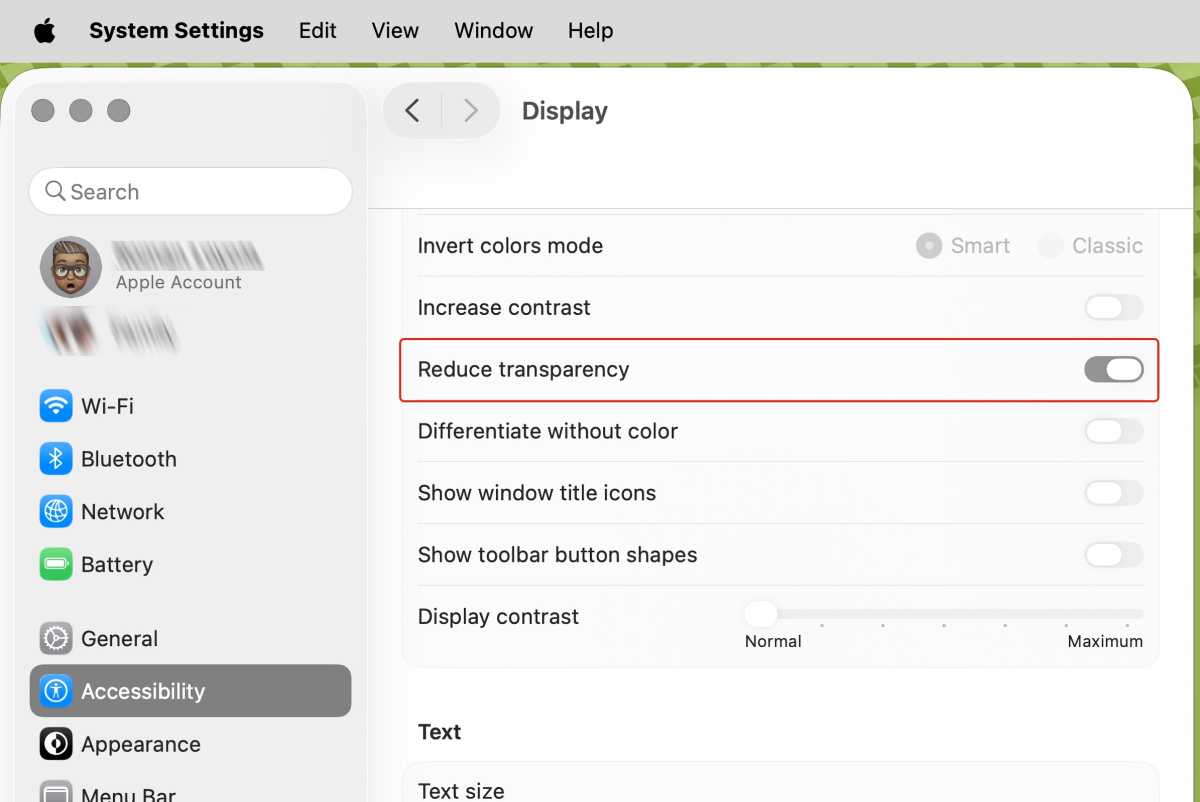
- Search for the Scale back transparency setting. The default for the swap is off. Flip the swap on to activate this setting.
Word that, for no matter cause, Apple determined to make the setting switches very dim in macOS Tahoe. Longtime Mac customers know that usually, settings that can’t be adjusted are dimmed like this. However in Tahoe, these settings are lively, and you’ll tweak them.
This isn’t a brand new setting, nevertheless it’s way more helpful in macOS Tahoe because of the Liquid Glass impact. To present you an thought of how this setting works, listed below are pictures of the way it impacts the menu bar.
Earlier than: Default transparency
Foundry
After: Scale back transparency
Foundry
Be taught extra about Apple’s subsequent Mac working system in our macOS Tahoe superguide. When you’re all for putting in the Tahoe Public Beta earlier than the official launch this fall, right here’s easy methods to get the macOS Tahoe Public Beta.